
Spring Boot环境下dubbo+zookeeper详解教程实战之四
今天我们完成框架的thymeleaf模板显示页面功能,页面的用户登陆,密码的AES加密解密,输错3次进行验证码验证功能,东西可能比较多,这个是我这两天在网上结合各种资源整合出来的,基本功能都已经实现,项目代码我会附在文章的最后面。
1.thymeleaf模板显示页面功能
简单说, Thymeleaf 是一个跟 Velocity、FreeMarker 类似的模板引擎,它可以完全替代 JSP 。相较与其他的模板引擎,它有如下三个极吸引人的特点:
a、Thymeleaf 在有网络和无网络的环境下皆可运行,即它可以让美工在浏览器查看页面的静态效果,也可以让程序员在服务器查看带数据的动态页面效果。这是由于它支持 html 原型,然后在 html 标签里增加额外的属性来达到模板+数据的展示方式。浏览器解释 html 时会忽略未定义的标签属性,所以 thymeleaf 的模板可以静态地运行;当有数据返回到页面时,Thymeleaf 标签会动态地替换掉静态内容,使页面动态显示。
b、Thymeleaf 开箱即用的特性。它提供标准和spring标准两种方言,可以直接套用模板实现JSTL、 OGNL表达式效果,避免每天套模板、该jstl、改标签的困扰。同时开发人员也可以扩展和创建自定义的方言。
c、Thymeleaf 提供spring标准方言和一个与 SpringMVC 完美集成的可选模块,可以快速的实现表单绑定、属性编辑器、国际化等功能。
下面在原有的项目框架中整合thymeleaf:
首先在pom.xml中添加thymeleaf的依赖

<dependency>
            <groupId>org.thymeleaf</groupId>
            <artifactId>thymeleaf</artifactId>
            <version>3.0.9.RELEASE</version>
        </dependency>

        <dependency>
            <groupId>org.thymeleaf</groupId>
            <artifactId>thymeleaf-spring4</artifactId>
            <version>3.0.9.RELEASE</version>
        </dependency>

        <dependency>
            <groupId>org.springframework.boot</groupId>
            <artifactId>spring-boot-starter-thymeleaf</artifactId>
        </dependency>
在customer模块的resources下创建static、templates文件夹,如下:
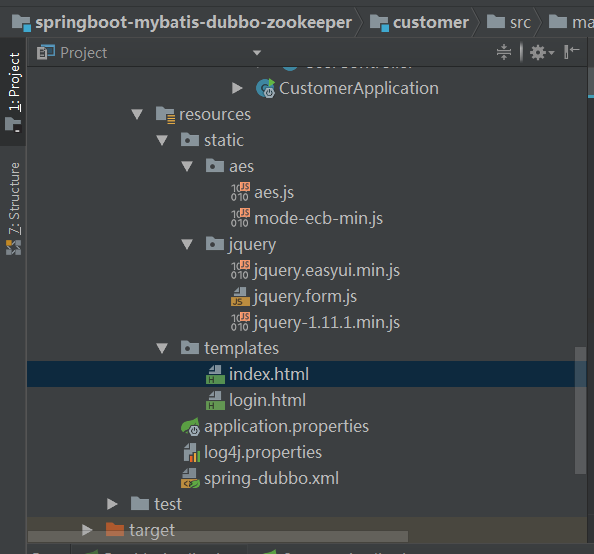
在static下放置一些页面样式的js和css,在templates文件夹下放置html页面,此时在resources下的application.properties配置文件中配置thymeleaf,
#thymelea模板配置
spring.thymeleaf.prefix=classpath:/templates/
spring.thymeleaf.suffix=.html
spring.thymeleaf.mode=HTML5
spring.thymeleaf.encoding=UTF-8
#热部署文件,页面不产生缓存,及时更新
spring.thymeleaf.cache=false
spring.resources.chain.strategy.content.enabled=true
spring.resources.chain.strategy.content.paths=/**
此时thymeleaf模板就配置完成了。
2.页面的用户登陆,AES加密解密:
关于AES的加密解密,我的实现思路是:首先用户在浏览器中输入网址跳转到登录页面,此时在页面中已经保存了从后台传过来的key,该key值是后台随机生成的,后台session中保存key值,前台页面的隐藏框中也要保存key值,用于前端页面的密码加密以及后端的密码解密,页面刷新或用户名、密码输入错误时,都会重新生成新的key值来替换原有保存的key。
首先在pom.xml中添加依赖:
<dependency>
            <groupId>com.alibaba</groupId>
            <artifactId>fastjson</artifactId>
            <version>1.2.28</version>
        </dependency>

        <!-- https://mvnrepository.com/artifact/commons-codec/commons-codec -->
        <dependency>
            <groupId>commons-codec</groupId>
            <artifactId>commons-codec</artifactId>
            <version>1.10</version>
        </dependency>
用AES加密解密
a.前端加密用到的js有:aes.js和mode-ecb-min.js,就为了下载这两个js花了我30个积分呢,[/哭],可以在static文件夹下创建一个aes文件夹,用于放置这两个js。js下载地址:https://download.csdn.net/download/weixin_38340967/10677798
在templates下创建login.html,代码如下:
<!DOCTYPE html>
<!--<html xmlns:th="http://www.thymeleaf.org" >-->
<html xmlns="http://www.w3.org/1999/xhtml" xmlns:th="http://www.thymeleaf.org"
      xmlns:sec="http://www.thymeleaf.org/thymeleaf-extras-springsecurity3">

<head>
    <meta charset="UTF-8">
    <title>welcome</title>
    <script type="text/javascript" src="../jquery/jquery-1.11.1.min.js"></script>
    <script type="text/javascript" src="../jquery/jquery.easyui.min.js"></script>
    <script type="text/javascript" src="../aes/aes.js"></script>
    <script type="text/javascript" src="../aes/mode-ecb-min.js"></script>
    <!--<script th:src="@{jquery/jquery-1.11.1.min.js}"></script>-->
    <!--<script th:src="@{jquery/jquery-1.11.1.min.js}"></script>-->
    <!--<script th:src="@{jquery/jquery-1.11.1.min.js}"></script>-->
    <!--<script th:src="@{jquery/jquery-1.11.1.min.js}"></script>-->
</head>
<body>
<input type="hidden" id="KEY" th:value="${model.loginToken}" />
<form action="signIn" method="post" id="loginForm">
    <div class="form-group has-feedback">
        <input type="text" class="form-control" placeholder="Email" name="username"
               onkeydown="javascript:if(event.keyCode==13) $('#password').focus();">
        <span class="glyphicon glyphicon-envelope form-control-feedback"></span>
    </div>
    <div class="form-group has-feedback">
        <input type="password" class="form-control" id="password"
               onkeydown="javascript:if(event.keyCode==13) login();" >
        <span class="glyphicon glyphicon-lock form-control-feedback"></span>
    </div>
    [[${session.SESSION_LOGIN_FAILURE_COUNT}]]
    <div class="form-group has-feedback" th:if="${session.SESSION_LOGIN_FAILURE_COUNT}<=0">
        <input name="checkCode" onkeydown="javascript:if(event.keyCode==13)  login();" type="text" id="checkCode" maxlength="4" style="width:120px;"/>
        <img src="getValidateCode" id="CreateCheckCode" align="middle" title="点击刷新验证码" onclick="getCode()"  style="cursor: pointer;">
        <span id="checkCodeSpan" style="color: red;"></span>
    </div>
<div class="row">
    <div class="col-xs-8">
        <div class="checkbox icheck">
            <label>
                <input type="checkbox" name="remember" checked="checked"  >记住密码
            </label>
        </div>
    </div>
    <!-- /.col -->
    <div class="col-xs-4">
        <button type="button" onclick="login()"  class="btn btn-primary btn-block btn-flat">登录</button>
    </div>
    <!-- /.col -->
</div>
</form>
<script>
    function login(){
        $('#loginForm').form('submit',{
            onSubmit: function(param){
                var username = $('#loginForm input[name=username]').val();
                if($.trim(username)==''){
                    alert('账号不能为空!')
                    $('#loginForm input[name=username]').focus();
                    return false;
                }
                var p = $('#loginForm #password').val();
                if($.trim(p)==''){
                    alert('密码不能为空!')
                    $('#loginForm #password').focus();
                    return false;
                }
                var checkCodeInput = $('#loginForm #checkCode');
                if(checkCodeInput.length>0){//判断元素是否存在
                    var checkCode = checkCodeInput.val();
                    if($.trim(checkCode)=='' || checkCode.length!=4 ){
                        alert('请输入4位验证码!')
                        checkCodeInput.select();
                        checkCodeInput.focus();
                        return false;
                    }
                }
                var key = $('#KEY').val();
                // alert("key的值是:  "+key);
                key = CryptoJS.enc.Utf8.parse(key);
                // alert("加密后key的值是:  "+key);
                p = CryptoJS.enc.Utf8.parse($.trim(p));
                var encrypted = CryptoJS.AES.encrypt(p, key, {mode:CryptoJS.mode.ECB,padding: CryptoJS.pad.Pkcs7});
                param.password = encrypted.toString();
            },
            success:function(data){
                var data = eval('(' + data + ')');
                if (data.success){
                    window.location.href = 'index';
                }else{
                    if(data.msg=='timeout'){//可能已经就登录了,无需再次登录
                        alert('登录超时或已经登录!');
                        window.location.href = '${request.contextPath}/';
                    }else if('用户名或密码错误!'==data.msg){//需要验证码了
                        alert('用户名或密码错误!');
                        window.location.href = 'login';
                    }else if('codeError'==data.msg){//验证码错误
                        getCode();
                        $('#checkCodeSpan').text('验证码错误');
                        $('#loginForm #checkCode').select();
                        $('#loginForm #checkCode').focus();
                    }else{
                        //登录失败,更新login_token
                        $('#KEY').val(data.data);
                        if($('#checkCodeSpan')){
                            $('#checkCodeSpan').text('');
                        }
                        alert(data.msg);
                    }
                }
            },

        }) ;
    }

    function getCode(){
        var img = document.getElementById("CreateCheckCode");
        img.src = "getValidateCode?nocache=" + new Date().getTime();
        // $("#CreateCheckCode").attr('src',"getValidateCode?nocache=" + new Date().getTime());
    }
</script>
</body>
</html>
这里有一个坑,就是在html页面中引入js的时候路径的问题,可以看到我在页面中是这样写的:<script type="text/javascript" src="../jquery/jquery-1.11.1.min.js"></script>,但是你仔细看应该是<script type="text/javascript" src="../static/jquery/jquery-1.11.1.min.js"></script>才对,为什么会少一个static呢,这是因为thymeleaf模板本身引入js时的路径就是默认在static下的,要是加上static反而页面会报js404错误,不信大家可以试试看。
var key = $('#KEY').val();
 // alert("key的值是:  "+key);
key = CryptoJS.enc.Utf8.parse(key);
// alert("加密后key的值是:  "+key);
p = CryptoJS.enc.Utf8.parse($.trim(p));
var encrypted = CryptoJS.AES.encrypt(p, key, {mode:CryptoJS.mode.ECB,padding: CryptoJS.pad.Pkcs7});
param.password = encrypted.toString();
这段代码就是通过AES将用户输入的明文密码和后台传过来的key加密成密文,放到input框中提交到后台。
b.后台生成随机的key值,并将前台传过来的密文解密成明文密码,
这里要在common模块中写几个工具类:EncryptUtil用于密码的加密解密,Helper用于记录一些常量,RandomUtil用于随机生成key值,Result用于向前台返回一个结果对象,样式如下:

工具类代码如下:
EncryptUtil:
package com.lj.common.util;

import javax.crypto.Cipher;
import javax.crypto.KeyGenerator;
import javax.crypto.spec.SecretKeySpec;

import org.apache.commons.codec.binary.Base64;

import sun.misc.BASE64Decoder;

import java.security.SecureRandom;

/**
 * Created with IntelliJ IDEA.
 * User: gaopeng
 * Date: 2018/9/17 0017
 * Time: 17:30
 * Description:
 */
public class EncryptUtil {
    private static final String KEY = "abcdefgabcdefg12";
    private static final String ALGORITHMSTR = "AES/ECB/PKCS5Padding";
    public static String base64Encode(byte[] bytes){
        return Base64.encodeBase64String(bytes);
    }
    public static byte[] base64Decode(String base64Code) throws Exception{
        return new BASE64Decoder().decodeBuffer(base64Code);
    }
    public static byte[] aesEncryptToBytes(String content, String encryptKey) throws Exception {
        KeyGenerator kgen = KeyGenerator.getInstance("AES");
        kgen.init(128);
        Cipher cipher = Cipher.getInstance(ALGORITHMSTR);
        cipher.init(Cipher.ENCRYPT_MODE, new SecretKeySpec(encryptKey.getBytes(), "AES"));

        return cipher.doFinal(content.getBytes("utf-8"));
    }
    public static String aesEncrypt(String content, String encryptKey) throws Exception {
        return base64Encode(aesEncryptToBytes(content, encryptKey));
    }
    public static String aesDecryptByBytes(byte[] encryptBytes, String decryptKey) throws Exception {
        KeyGenerator kgen = KeyGenerator.getInstance("AES");
        SecureRandom secureRandom = SecureRandom.getInstance("SHA1PRNG" );
        secureRandom.setSeed(decryptKey.getBytes());
        kgen.init(128,secureRandom);

        Cipher cipher = Cipher.getInstance(ALGORITHMSTR);
        cipher.init(Cipher.DECRYPT_MODE, new SecretKeySpec(decryptKey.getBytes(), "AES"));
        byte[] decryptBytes = cipher.doFinal(encryptBytes);

        return new String(decryptBytes);
    }
    public static String aesDecrypt(String encryptStr, String decryptKey) throws Exception {
        return aesDecryptByBytes(base64Decode(encryptStr), decryptKey);
    }


    /**
     * 测试
     *
     */
    public static void main(String[] args) throws Exception {

        String content = "Test String么么哒";  //0gqIDaFNAAmwvv3tKsFOFf9P9m/6MWlmtB8SspgxqpWKYnELb/lXkyXm7P4sMf3e
        System.out.println("加密前:" + content);

        System.out.println("加密密钥和解密密钥:" + KEY);

        String encrypt = aesEncrypt(content, KEY);
        System.out.println(encrypt.length()+":加密后:" + encrypt);

        String decrypt = aesDecrypt(encrypt, KEY);
        System.out.println("解密后:" + decrypt);
    }
}
Helper:
package com.lj.common.util;

/**
 * Created with IntelliJ IDEA.
 * User: gaopeng
 * Date: 2018/9/17 0017
 * Time: 17:08
 * Description:
 */
public class Helper {
    public static final String SESSION_CHECKCODE = "SESSION_CHECKCODE";
    public static final String SESSION_LOGIN_TOKEN = "SESSION_LOGIN_TOKEN";
    public static final String SESSION_USER = "SESSION_USER";
    public static final String SESSION_LOGIN_FAILURE_COUNT = "SESSION_LOGIN_FAILURE_COUNT";
    public static final String logTypeSecurity = "logTypeSecurity";
    public static final Integer COUNT = 3;
}
RandomUtil:
package com.lj.common.util;

import java.util.Random;

/**
 * Created with IntelliJ IDEA.
 * User: gaopeng
 * Date: 2018/9/17 0017
 * Time: 17:22
 * Description:
 */
public class RandomUtil {
    public static final String ALLCHAR = "0123456789abcdefghijklmnopqrstuvwxyzABCDEFGHIJKLMNOPQRSTUVWXYZ";
    public static final String LETTERCHAR = "abcdefghijkllmnopqrstuvwxyzABCDEFGHIJKLMNOPQRSTUVWXYZ";
    public static final String NUMBERCHAR = "0123456789";

    /**
     * 返回一个定长的随机字符串(只包含大小写字母、数字)
     *
     * @param length
     *            随机字符串长度
     * @return 随机字符串
     */
    public static String generateString(int length) {
        StringBuffer sb = new StringBuffer();
        Random random = new Random();
        for (int i = 0; i < length; i++) {
            sb.append(ALLCHAR.charAt(random.nextInt(ALLCHAR.length())));
        }
        return sb.toString();
    }

    /**
     * 返回一个定长的随机纯字母字符串(只包含大小写字母)
     *
     * @param length
     *            随机字符串长度
     * @return 随机字符串
     */
    public static String generateMixString(int length) {
        StringBuffer sb = new StringBuffer();
        Random random = new Random();
        for (int i = 0; i < length; i++) {
            sb.append(LETTERCHAR.charAt(random.nextInt(LETTERCHAR.length())));
        }
        return sb.toString();
    }

    /**
     * 返回一个定长的随机纯大写字母字符串(只包含大小写字母)
     *
     * @param length
     *            随机字符串长度
     * @return 随机字符串
     */
    public static String generateLowerString(int length) {
        return generateMixString(length).toLowerCase();
    }

    /**
     * 返回一个定长的随机纯小写字母字符串(只包含大小写字母)
     *
     * @param length
     *            随机字符串长度
     * @return 随机字符串
     */
    public static String generateUpperString(int length) {
        return generateMixString(length).toUpperCase();
    }

    /**
     * 生成一个定长的纯0字符串
     *
     * @param length
     *            字符串长度
     * @return 纯0字符串
     */
    public static String generateZeroString(int length) {
        StringBuffer sb = new StringBuffer();
        for (int i = 0; i < length; i++) {
            sb.append('0');
        }
        return sb.toString();
    }

    /**
     * 根据数字生成一个定长的字符串,长度不够前面补0
     *
     * @param num
     *            数字
     * @param fixdlenth
     *            字符串长度
     * @return 定长的字符串
     */
    public static String toFixdLengthString(long num, int fixdlenth) {
        StringBuffer sb = new StringBuffer();
        String strNum = String.valueOf(num);
        if (fixdlenth - strNum.length() >= 0) {
            sb.append(generateZeroString(fixdlenth - strNum.length()));
        } else {
            throw new RuntimeException("将数字" + num + "转化为长度为" + fixdlenth
                    + "的字符串发生异常!");
        }
        sb.append(strNum);
        return sb.toString();
    }

    /**
     * 每次生成的len位数都不相同
     *
     * @param param
     * @return 定长的数字
     */
    public static int getNotSimple(int[] param, int len) {
        Random rand = new Random();
        for (int i = param.length; i > 1; i--) {
            int index = rand.nextInt(i);
            int tmp = param[index];
            param[index] = param[i - 1];
            param[i - 1] = tmp;
        }
        int result = 0;
        for (int i = 0; i < len; i++) {
            result = result * 10 + param[i];
        }
        return result;
    }
}
Result:
package com.lj.common.util;

import java.util.Date;

/**
 * Created with IntelliJ IDEA.
 * User: gaopeng
 * Date: 2018/9/17 0017
 * Time: 18:26
 * Description:
 */
public class Result {
    private Boolean success;
    private String msg;
    private String key;

    public Boolean getSuccess() {
        return success;
    }

    public void setSuccess(Boolean success) {
        this.success = success;
    }

    public String getMsg() {
        return msg;
    }

    public void setMsg(String msg) {
        this.msg = msg;
    }

    public String getKey() {
        return key;
    }

    public void setKey(String key) {
        this.key = key;
    }

    public Result(Boolean b, String s){
        this.success = b;
        this.msg = s;
    }

    public Result(Boolean b, String s, String k){
        this.success = b;
        this.msg = s;
        this.key = k;
    }
}
在customer模块中的controller中拦截/login和/signIn路径的代码如下:
    @GetMapping("login")
    public ModelAndView login(HttpServletResponse response, HttpServletRequest request, Model model){
        //生成login_token

        HttpSession session = request.getSession();
        String key = RandomUtil.generateString(16);
        session.setAttribute(Helper.SESSION_LOGIN_TOKEN, key);//登录令牌,用于密码加密的key,16位长度
        if(session.getAttribute(Helper.SESSION_LOGIN_FAILURE_COUNT) == null){
            session.setAttribute(Helper.SESSION_LOGIN_FAILURE_COUNT, Helper.COUNT);//登录剩余失败次数
        }
        model.addAttribute("loginToken",key);
        System.out.println("传到前台的key值为:"+ key);
        System.out.println("页面跳转到login.html");
//        return "login";
//        if(session.getAttribute(Helper.SESSION_USER) == null){
            return new ModelAndView("login","model",model);
//        }
//        else
//            return "redirect:/";
    }
    @PostMapping(value = "signIn")
    @ResponseBody
    public String signIn(String username,String password,boolean remember,String checkCode,HttpServletRequest request, HttpServletResponse response){
        System.out.println(username+","+password+","+remember+","+checkCode);
        HttpSession session = request.getSession();
        Object token = session.getAttribute(Helper.SESSION_LOGIN_TOKEN);//原始令牌

        if(token==null) return JSON.toJSONString(new Result(false,"timeout"));//登录成功后token失效,则页面失效,客户端需要重定向到主界面
        Object countObj = session.getAttribute(Helper.SESSION_LOGIN_FAILURE_COUNT);
        int count = countObj==null?3:Integer.parseInt(countObj.toString());
        System.out.println("剩余次数:"+count);
        //验证码逻辑
        if(count<=0){//需要验证码
            Object oldCode = session.getAttribute(Helper.SESSION_CHECKCODE);
            if(checkCode==null||oldCode==null){//该登录界面没有验证码字段,但是已经消耗掉了剩余次数,说明该页面是过期页面,需要重新登录
                System.out.println("chaoshila");
                return JSON.toJSONString(new Result(false,"timeout"));//客户端需要重定向到主界面
            }
            if(checkCode.trim().isEmpty()) return JSON.toJSONString(new Result(false,"请输入验证码"));
            if(oldCode.toString().equalsIgnoreCase(checkCode)){
                //验证通过,可信客户端,给0次剩余次数
                count=0;
                session.setAttribute(Helper.SESSION_LOGIN_FAILURE_COUNT,count);
            }else{
                return JSON.toJSONString(new Result(false,"codeError"));//验证码不正确,客户端需要刷新验证码
            }
        }
        //解密
        try {
            password = EncryptUtil.aesDecrypt(password,token.toString());//解密后
            System.out.println("Decrypt:"+password);
        } catch (Exception e) {
            e.printStackTrace();
            return JSON.toJSONString(new Result(false,"timeout"));//客户端需要重定向到主界面
        }
        //登录校验
        String loginKey = RandomUtil.generateString(16);//重新生成登录令牌,任何登录失败的操作都需要更新登录令牌
        User user =  null;
        System.out.println(user == null);
        if(user == null){
            session.setAttribute(Helper.SESSION_LOGIN_TOKEN,loginKey);
            session.setAttribute(Helper.SESSION_LOGIN_FAILURE_COUNT,--count);//剩余次数-1
            System.out.println("剩余次数:" + session.getAttribute(Helper.SESSION_LOGIN_FAILURE_COUNT));
            //if(count<=0) return JSON.toJSONString(new Result(false,"checkCode",loginKey));//客户端需要重定向到登录界面将验证码显示出来
            System.out.println("这里直接要返回了!!!");
            Result result = new Result(false,"用户名或密码错误!",loginKey);
            System.out.println("result对象的值是:" + result.getKey());
            System.out.println(JSON.toJSONString(result));
            return JSON.toJSONString(new Result(false,"用户名或密码错误!",loginKey));
        }else{
//            if(user.getUserid()!=ConfigInfo.admin_id && !user.getuStatus().equals(ConfigInfo.user_status_normal)) {
//                session.setAttribute(Helper.SESSION_LOGIN_TOKEN,key);
//                return JSON.toJSONString(new Result(false,"登录失败,该账号已被禁止使用!",key));
//            }
            //登录成功
            session.removeAttribute(Helper.SESSION_LOGIN_TOKEN);
//            loginUser = user;
            session.setAttribute(Helper.SESSION_USER,user);
//            sysEventService.insertEventLog(Helper.logTypeSecurity,username+" 登录系统");
            return JSON.toJSONString(new Result(true,"登录成功!"));
        }
    }
上面生成key以及解密的部分都有注解,应该能看懂的。

c.输错3次显示验证码
这里要实现验证码功能,首先要在common中写一个工具类,用于生成验证码,代码如下:
package com.lj.common.util;

import java.awt.Color;
import java.awt.Font;
import java.awt.Graphics2D;
import java.awt.image.BufferedImage;
import java.io.FileOutputStream;
import java.io.IOException;
import java.io.OutputStream;
import java.util.Random;

import javax.imageio.ImageIO;
/**
 * Created with IntelliJ IDEA.
 * User: gaopeng
 * Date: 2018/9/17 0017
 * Time: 16:57
 * Description:
 */
public class ValidateCode {
    // 图片的宽度。
    private int width = 160;
    // 图片的高度。
    private int height = 28;
    // 验证码字符个数
    private int codeCount = 4;
    // 验证码干扰线数
    private int lineCount = 150;
    // 验证码
    private String code = null;
    // 验证码图片Buffer
    private BufferedImage buffImg = null;

    private char[] codeSequence = { 'A', 'B', 'C', 'D', 'E', 'F', 'G', 'H', 'I', 'J', 'K', 'L', 'M', 'N', 'P', 'Q', 'R',
            'S', 'T', 'U', 'V', 'W', 'X', 'Y', 'Z', '1', '2', '3', '4', '5', '6', '7', '8', '9' };

    public ValidateCode() {
        this.createCode();
    }

    /**
     *
     * @param width
     *            图片宽
     * @param height
     *            图片高
     */
    public ValidateCode(int width, int height) {
        this.width = width;
        this.height = height;
        this.createCode();
    }

    /**
     *
     * @param width
     *            图片宽
     * @param height
     *            图片高
     * @param codeCount
     *            字符个数
     * @param lineCount
     *            干扰线条数
     */
    public ValidateCode(int width, int height, int codeCount, int lineCount) {
        this.width = width;
        this.height = height;
        this.codeCount = codeCount;
        this.lineCount = lineCount;
        this.createCode();
    }

    public void createCode() {
        int x = 0, fontHeight = 0, codeY = 0;
        int red = 0, green = 0, blue = 0;

        x = width / (codeCount + 2);// 每个字符的宽度
        fontHeight = height - 2;// 字体的高度
        codeY = height - 4;

        // 图像buffer
        buffImg = new BufferedImage(width, height, BufferedImage.TYPE_INT_RGB);
        Graphics2D g = buffImg.createGraphics();
        // 生成随机数
        Random random = new Random();
        // 将图像填充为白色
        g.setColor(Color.WHITE);
        g.fillRect(0, 0, width, height);
        // 创建字体
        Font font = new Font("Fixedsys", Font.BOLD, fontHeight);
        g.setFont(font);
        //干扰线
        for (int i = 0; i < lineCount; i++) {
            int xs = random.nextInt(width);
            int ys = random.nextInt(height);
            int xe = xs + random.nextInt(width / 8);
            int ye = ys + random.nextInt(height / 8);
            red = random.nextInt(255);
            green = random.nextInt(255);
            blue = random.nextInt(255);
            g.setColor(new Color(red, green, blue));
            g.drawLine(xs, ys, xe, ye);
        }

        // randomCode记录随机产生的验证码
        StringBuffer randomCode = new StringBuffer();
        // 随机产生codeCount个字符的验证码。
        for (int i = 0; i < codeCount; i++) {
            String strRand = String.valueOf(codeSequence[random.nextInt(codeSequence.length)]);
            // 产生随机的颜色值,让输出的每个字符的颜色值都将不同。
            red = random.nextInt(255);
            green = random.nextInt(255);
            blue = random.nextInt(255);
            g.setColor(new Color(red, green, blue));
            g.drawString(strRand, (i + 1) * x, codeY);
            // 将产生的四个随机数组合在一起。
            randomCode.append(strRand);
        }
        // 将四位数字的验证码保存到Session中。
        code = randomCode.toString();
    }

    public void write(String path) throws IOException {
        OutputStream sos = new FileOutputStream(path);
        this.write(sos);
    }

    public void write(OutputStream sos) throws IOException {
        ImageIO.write(buffImg, "png", sos);
        sos.close();
    }

    public BufferedImage getBuffImg() {
        return buffImg;
    }

    public String getCode() {
        return code;
    }
}
在customer模块中的controller,编写拦截/getValidateCode路径的请求,用于生成验证码,代码如下:
 @GetMapping("getValidateCode")
    public void getValidateCode(HttpServletRequest reqeust, HttpServletResponse response) throws IOException {
        response.setContentType("image/jpeg");
        // 禁止图像缓存。
        response.setHeader("Pragma", "no-cache");
        response.setHeader("Cache-Control", "no-cache");
        response.setDateHeader("Expires", 0);

        HttpSession session = reqeust.getSession();

        ValidateCode vCode = new ValidateCode(100, 28, 4, 100);
        session.setAttribute(Helper.SESSION_CHECKCODE, vCode.getCode());
        vCode.write(response.getOutputStream());
    }
验证码在3次输入错误用户名密码后启动的逻辑代码在上面都已经贴出来了,这个3次是存储在session中的,前台页面要通过获取session中的“可输入错误剩余次数SESSION_LOGIN_FAILURE_COUNT”来判断
至此,页面的用户登陆,密码的AES加密解密,输错3次进行验证码验证功能。演示效果如下:
第一次:

第二次:

第三次:
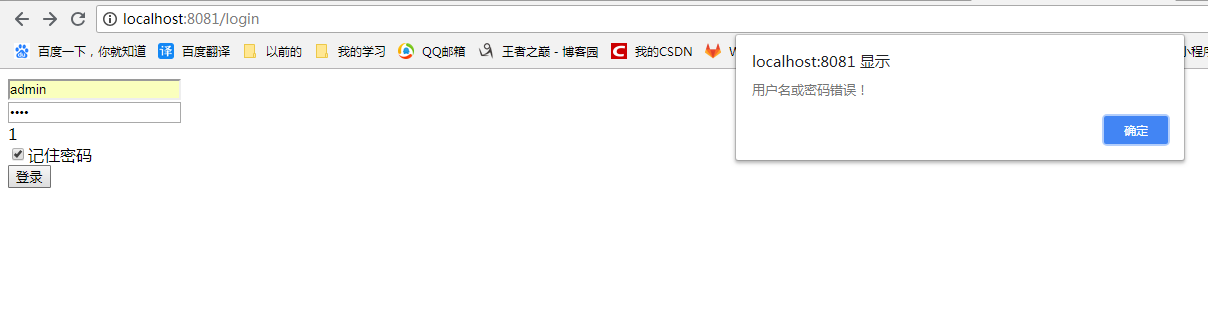
第三次以后的页面就有验证码了:

下面是该项目的源码下载地址:https://download.csdn.net/download/weixin_38340967/10677372
文章参考文献:https://www.cnblogs.com/nicknailo/p/8947643.html
http://itfish.net/article/64414.html


评论